Gilded pendulums and spray painted kitchen.
- Sanna Wieslander

- Oct 12, 2021
- 3 min read
Updated: Jun 13, 2023
It's been so long since I wrote here again! Lately, a lot has happened. I had some summer vacation from school and then I worked at Colorama here in Skövde. Super fun! When it comes to decorative painting, I feel pretty confident in what products to use but when it comes to house facades and outdoor environments, I am a little more lost. So it has been great! I've learned so much! And everyone who works there are so sweet at proffesional. After that I took three weeks off enjoying the swedish summer with our little family. We built a terrace at home and rented a camper and traveled down through Sweden. And poof, the holiday was over. But it was wonderful!
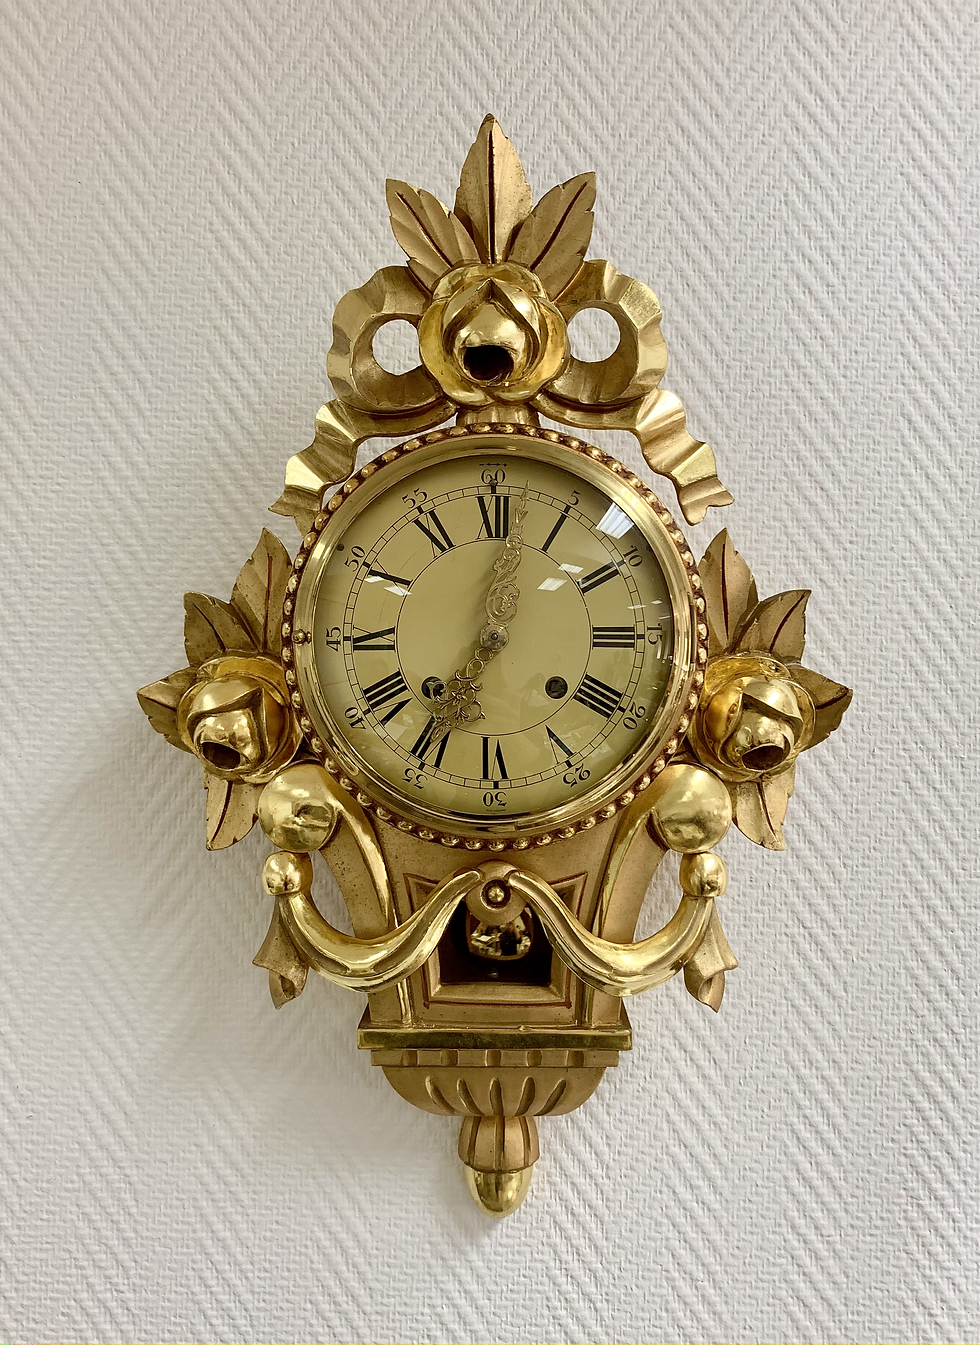
Now I'm back at Tibro Craft Academy. Term 3 of 4. In august we started the course restoration with a focus on gilding. We got various worn gilded objects that had to be repaired and gilded again. Me and my classmate Lovisa got a pendulum where the gold was loose or gone in several places. So then we had to learn how to rebuild the surface and make it merge with the old gilding that was left.
It looked like this:


And this is how it turned out after we gilded, patinated and put all the parts back together again. I think gilding is super fun! But this particular thing about restoring pendulums, I'm not sure if that's my thing. It's incredibly time consuming! I will not nerd myself and write all the steps that need to be done to gild in this way (Then you will probably fall asleep). But it was very instructive and fun to learn! And I'm impressed by those who work with this type of restoration!
Then it was time for course B in spray painting. We had a few days with theory and then we had to bring our own projects from home to work with. I brought our worn coffee table. And our whole kitchen (haha). So I had my hands full there for a while. But it's sooooo fun with spray painting! It turn out so smooth and nice! Now I'm thinking about where I can build my own spray booth at home. I'll need to buy a bigger houses for all toys!
Here's what it looked like:

This is what our coffee table looked like before. Damaged and worn.


I removed the old paint, grinded the surface and primed it.


Spray painted one of the parts in black again.

And I took the small disc with me home and marbled it (This is the underside). Ebba kept me company :)

And this is how the top turned out.

Tadaa! Finished!

Then it was time for the kitchen! 35 cabinet doors to be precise. Had I known how many times you would need to grind all the cabinets (and that I would get my life's first back shot in the meantime) I would probably have changed my mind and chosen a smaller project. But now that everything is done, I am very happy that I brought the kitchen!
We have lived in our house for 2 years now. The kitchen was nice! But not our style. But at the same time it felt very unnecessary to spend a lot of money on replacing the kitchen when it was in such a good standard. So this was a perfect opportunity for a little refreshment! So we chose to change the color of the doors and plug the holes for the old fittings and change them to something more modern.

This is what it looked like before (a little too rustic and white for our taste).

This is what it looked like without cabinet doors. An absolutely wonderful environment when you have a 2-year-old in the house (haha).

Grinded, primed and made new holes for the handels.

First you grind the doors, then you prime, then you grind them again, then you prim them again, then you grind them again and then! Finally on with some topcoat!

And this is how the kitchen turned out with some new color and handles! (Jotuns "Comfort gray" - gloss 15) I'm so happy with the result!

Now I'll just need to paint the frame as well and possibly change the countertop.Then it's done! :)


Comments